You’ve installed your brand new home office and would like it to look stunning. But there’s an issue: the cords from your blinds hang down to block your view and make the room appear messy. But don’t fret; cord-free blinds are a fantastic solution to give your office a look that is elegant and professional.
Blinds with cordless technology offer a variety of advantages when compared to conventional window treatment. They’re durable, safe to operate, and attractive visually, and they offer you a wider selection of materials, prices, and colours.
In this article, we’ll look at the benefits of blinds made with cordless technology and break down the various types of blinds offered. We’ll also guide you through the step-by-step process of installing the blinds so that you can start with your new window treatment immediately.
How to Install Cordless Blinds
To get started with those blinds, you’ll require the following items:
- Pencil
- Tape measures
- Leveller
- Drilling power OR screwdriver and hammer and nail
- The mounting hardware, blinds, and shades that were included
- Stepladder
- Drywall anchors (necessary when you’re not drilling into the or a stud)
Set up your blinds and the hardware to make sure you have everything needed to hang it. Ready to go? Let’s begin the installation process with a step-by-step guide.
Step 1: Measure
Make measurements to determine where you’ll put the screws.
For cordless shades that are mounted outside, place the headrail on the trim or over the window. Make use of a leveler to make sure that it is straight and level, and then lightly trace all edges on the headrail using a pencil.
Inside mounting, cordless shades must include the headrail within the frame of the window. Be sure to leave a minimum of 1/4″ space between the window and the blind to prevent hitting it when the blinds are fully extended. Utilize a leveller to make sure that the blind’s front is straight. Then, lightly trace the edges using a pencil.
he brackets should be lined up using the pencil marks you created in the previous set. Mark the holes for screws on the brackets with the pencil. Make this mark for each bracket on the side of the headrail as well as the centre bracket, in case your blinds are large enough to need one. Contrary to what you might think, the centre bracket should be set slightly to the left so as not to interfere with blind mechanisms. So keep this in mind.
Step 2: Drill Holes
With a 3/16″ drill, you can create pilot holes for screws. If you intend to attach wall anchors you should use a 1/8″ drill instead. If you don’t own the power drill, make pilot holes by hammering a nail into the wall using the hammer and then pulling it out. You should ensure that you choose an anchor that has an approximate diameter to one of the drill bits.
Step 3: Connect The Brackets To The Mounting
After making the pilot holes, you can line up the bracket you are using. After that, use your screwdriver or power drill to attach the wall bracket with screws.
Repeat the same procedure for the bracket on the opposite side and attach any other centre brackets that might be needed. Then, make sure all the brackets are securely attached to the wall and aligned properly.
Step 4: Install The Headrail
The next step is to place the headrail in the brackets. The directions differ slightly based on the kind of shade you’ve chosen. If the blinds you purchased came with a valance, then you may want to secure the clips to the valance prior to putting them on the headrail.
This will ensure that they’re properly placed and will not interfere with operating the blinds.
- Blinds made of faux and wood Headrails: Slide the rail onto the brackets. Slide the tabs on the front until they snap into place with a secure click.
- Mini blinds: Move the headrail so that it is placed so that the bracket’s front edges are below the front edge of the railing. Move the headrail up until the flexible tab on the lower end of every bracket snaps into the side of the railing.
- Woven wooden shades: Take the headrail up and put the pins on each side of the blinds within the brackets’ holes.
- Zebra shade: slide the back of the headrail onto the metal tabs to the rear of each bracket. Press upwards so that the brackets can snap to the rail. The plastic tabs at the top of each bracket are towards the side of the shade in order to lock the brackets to the shade. If you are mounting inside the shade, you can use pliers to do this if you’re unable to access the tabs.
- Roman shades and roller shades: Place the spring-loaded rod into the hole in the round of the bracket. Push the spring-loaded end inside the bracket. On the other side, put the hook arms in the bracket’s two holes for the hook arm’s receivers. After both hook arms have been in place, pull them down onto the railing until both hook arms are locked tightly on the bracket.
- Cellular shades: Slide the front part of your bracket to the groove at the top of the headrail. It is necessary to keep the headrail at an angle first. Then, tilt the shade toward the window until it snaps in place.
- Pleated fabric shades Shades are made of pleated fabric in a position such that the front edge of the rail is able to slide into the slot at the top of every bracket. Move the headrail up until the tab with a flexible end in the middle of every bracket is snapped into the rear part of the headrail.
Make sure that the brackets are properly secured prior to attempting to test the blind. Blinds that operate with cordless technology simply grasp the rail at the bottom and lift and lower it to the desired height.
After you’ve adjusted your blinds according to your preference, then let go of the bottom rail, and they will remain in position.
What are the Advantages of Cordless Blinds?
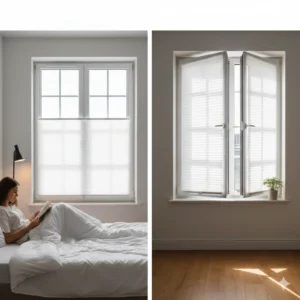
There are a lot of advantages to cordless blinds. Take a look at safety. With no cords, there is no risk of strangulation or choking for pets and children. Eliminating cords will make your home safe for everyone.
The cordless blinds look nicer and are more user-friendly. Instead of yanking cords, it is possible to raise and lower your blinds by using the bar on the lower end. With all these benefits and advantages, it’s no wonder many homeowners are opting for blinds with cordless cords instead of cords.
Every window treatment comes with its own drawbacks, naturally, and blinds made of cords and cords are no exception.
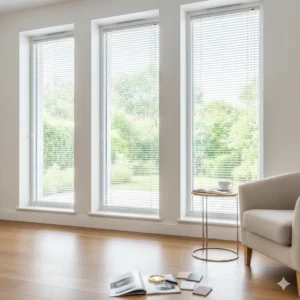
If you’re considering blinds with cords in your residence, keep in mind that they’re not the most appropriate choice if you have windows that are very tall. It’s because it’s difficult to reach the bottom of blinds once they’ve been fully pulled down.
Blinds made of cords can be problems if you have windows in your home where the weight of furniture or other obstructions can make it difficult to reach the lower part of your blinds once the blinds are fully stretched.
Blinds with cords, in contrast, may last longer than those with cords; however, the final decision on the length of time your blinds last depends on a variety of aspects (including the way you maintain the blinds).
When to Choose Cordless Blinds
There are a variety of situations in which you may want to think about installing blinds with cordless technology. These include:
- If you have kids or pets that are constantly running around.
- If you need window treatments for your nursery to decorate a room for children or a bedroom for a child,
- If you’re sick of having to deal with cords for blinds and you want to rid yourself of blind cords, you should get rid of them.
- If you are looking for blinds that can be easier to operate, then corded blinds are the way to go.
On the other hand, there are a few instances where cordless shades may not be the best choice. This includes:
- You are unable to get to the base of the blinds if they’re fully retracting because the windows are too high.
- You are unable to get to the bottom of the blinds if they’re fully extended because of obstructions from furniture or other objects.
In these cases, it is possible that blinds with cords are better suited.
Types of Cordless Blinds
If you are looking for cordless blinds, you don’t have to stick with the same style or design. Actually, you can pick from a variety of cordless shades. Here’s a brief overview of the most well-known cordless blinds in the market today:
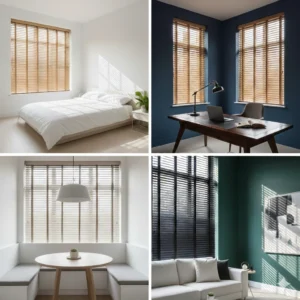
Wood and Faux Wood Cordless Blinds
Blinds made from genuine wood are among the most sought-after styles of blinds that homeowners choose to use in their homes. It’s simple to understand why they’re timeless! They work with any interior and provide your home with a touch of elegance.
If you’re searching for a wood look but don’t want to invest the same amount, faux blinds made from wood are an excellent alternative.
They’re made of a mixture of wood afibres as well as PVC, which makes them more durable than authentic wooden blinds and are able to endure more moisture, making them ideal for places such as the basement or bathroom.
Cordless Woven Wooden Shades
The shades made from woven wood are created out of a bamboo mat or other fibrous fibres. The fibres are weaved into a mat, which can be unrolled and rolled to cover windows. However, they allow some light in.
They can also be paired with a dark-coloured liner to provide additional privacy and control.
Cordless Roller Shades
Roller shades are made from fabric or vinyl and are rolled into one smooth piece. The sleek, minimalist style is perfect for modern and minimalist houses. They also make a great second layer under curtains or another kind of window blind because of their minimalist and low-profile design.
FAQs About Installing Cordless Blinds
Are cordless blinds simple to set up?
Blinds with cordless technology are among the simplest window treatments to set up. In the majority of cases, they can be installed yourself in only a few minutes using these easy steps:
- Gather your supplies
- Make sure you measure your window
- Drill holes to accommodate the brackets
- Install the brackets
- Hang your blinds
- Make adjustments to the slats
The majority of blinds include specific instructions for the product. Make sure you follow these to get the most effective outcomes.
How do blinds made of cordless stay in their place?
The majority of blinds made from cordless are secured by brackets which are hung on the wall or the window frame. The brackets come with slots that the headrail of blinds to slide through and are typically held in place by screws.
Different types of cordless blinds will come with special brackets loaded with springs that are able to grip the headrail, or they can be secured to the headrail using magnets.
What equipment do you require to set up blinds with cordless technology?
Before making your blinds, make sure that you have these items of equipment available:
-
- Pencil
- Tape measures
- Leveler
- The power drill OR Screwdriver and hammer and nail
- Stepladder
- Drywall anchors (necessary for those who aren’t drilling into the wall stud)
Make sure you have all the items prior to starting so that you can complete your work productively and quickly.
How long will blinds with cordless technology require to be installed?
The exact time needed to install blinds with cordless technology will depend on the dimensions and style of blinds you are using, as well as the level of expertise you have. However, generally, you can anticipate that the entire process will last no longer than thirty minutes.